Mount Shasta Climb: June 14-16, 2019

I have driven past Mount Shasta many times and have admired it from a distance. I never thought that one day I will climb to the top! Having climbed Mount Whitney last year, I was looking for the next challenge and Mount Shasta was the perfect step up. It is 300ft shorter than Whitney but is a lot more challenging.
Climbing Mount Shasta requires some technical skills therefore it is advisable to go with a guide unless you are already an accomplished alpine climber. I decided to sign up with REI Adventure - they contract it out to Shasta Mountain Guides. My friends Vikas and Ankur decided to join as well. We decided to take the south face, Avalanche Gulch route.
Mt. Shasta is a great mountain to climb if you want to experience proper alpine mountaineering, challenge yourself physically and mentally, learn some technical skills and not take undue risks.
Trail Overview
- Distance: ~12 miles
- Total Climbing: 7,200 ft (that's right - 7,000+ ft of climb in less than 6 miles)
- Max Elevation: 14,180 ft
Here's a map I created in CalTOPO which shows the elevation contours and slope angle shading. Orange color indicates slopes ranging from 30-45 degrees. Each line color represents a different day. CalTOPO Link
Day 1: June 13, 2019. Drive to Shasta
Ankur, Vikas and I rented a car from San Jose and drove to Shasta. Ankur is a frequent Hertz renter and was able to get an upgrade to Jaguar :) The extra horsepower helped because we had a delayed start and Ankur needed to reach Shasta before 6pm to rent his gear. We managed to reach at 5:50pm !
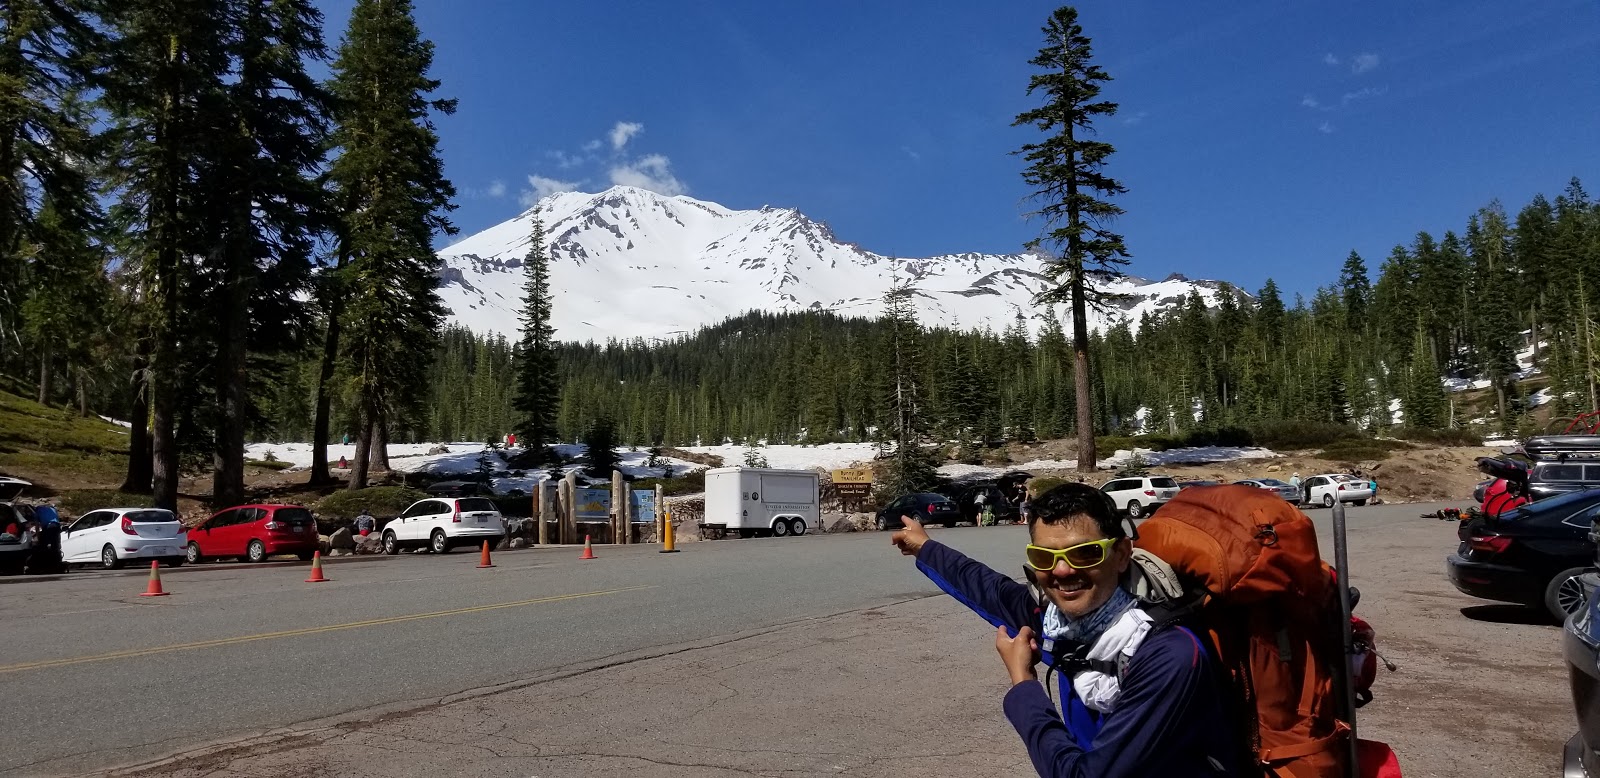
 |
| View of Mount Shasta from our car. Looks quite formidable. Can we really climb this beast? |
Day 2: June 14, 2019. Climb from Bunny Flat to Horse Camp
Bunny Flat Elevation: 6763 ft
Horse Camp Elevation: 7651 ft
Elevation Gain: 900 ft
Distance: 1.6 miles
We met our guides Casey and Clayton and the other two climbers in our group Alex and Jimmy in the morning. Casey and Clayton did a gear check to make sure that we had everything we will need and were not carrying any extra baggage either. They then proceeded to give us the shared load - tents, kitchen stuff etc. They taught us the brick and mortar technique to pack the backpack - put all the solid shapes first then fill the soft things like clothes, socks etc. around them.
We ended up with a ~50 lb backpack !
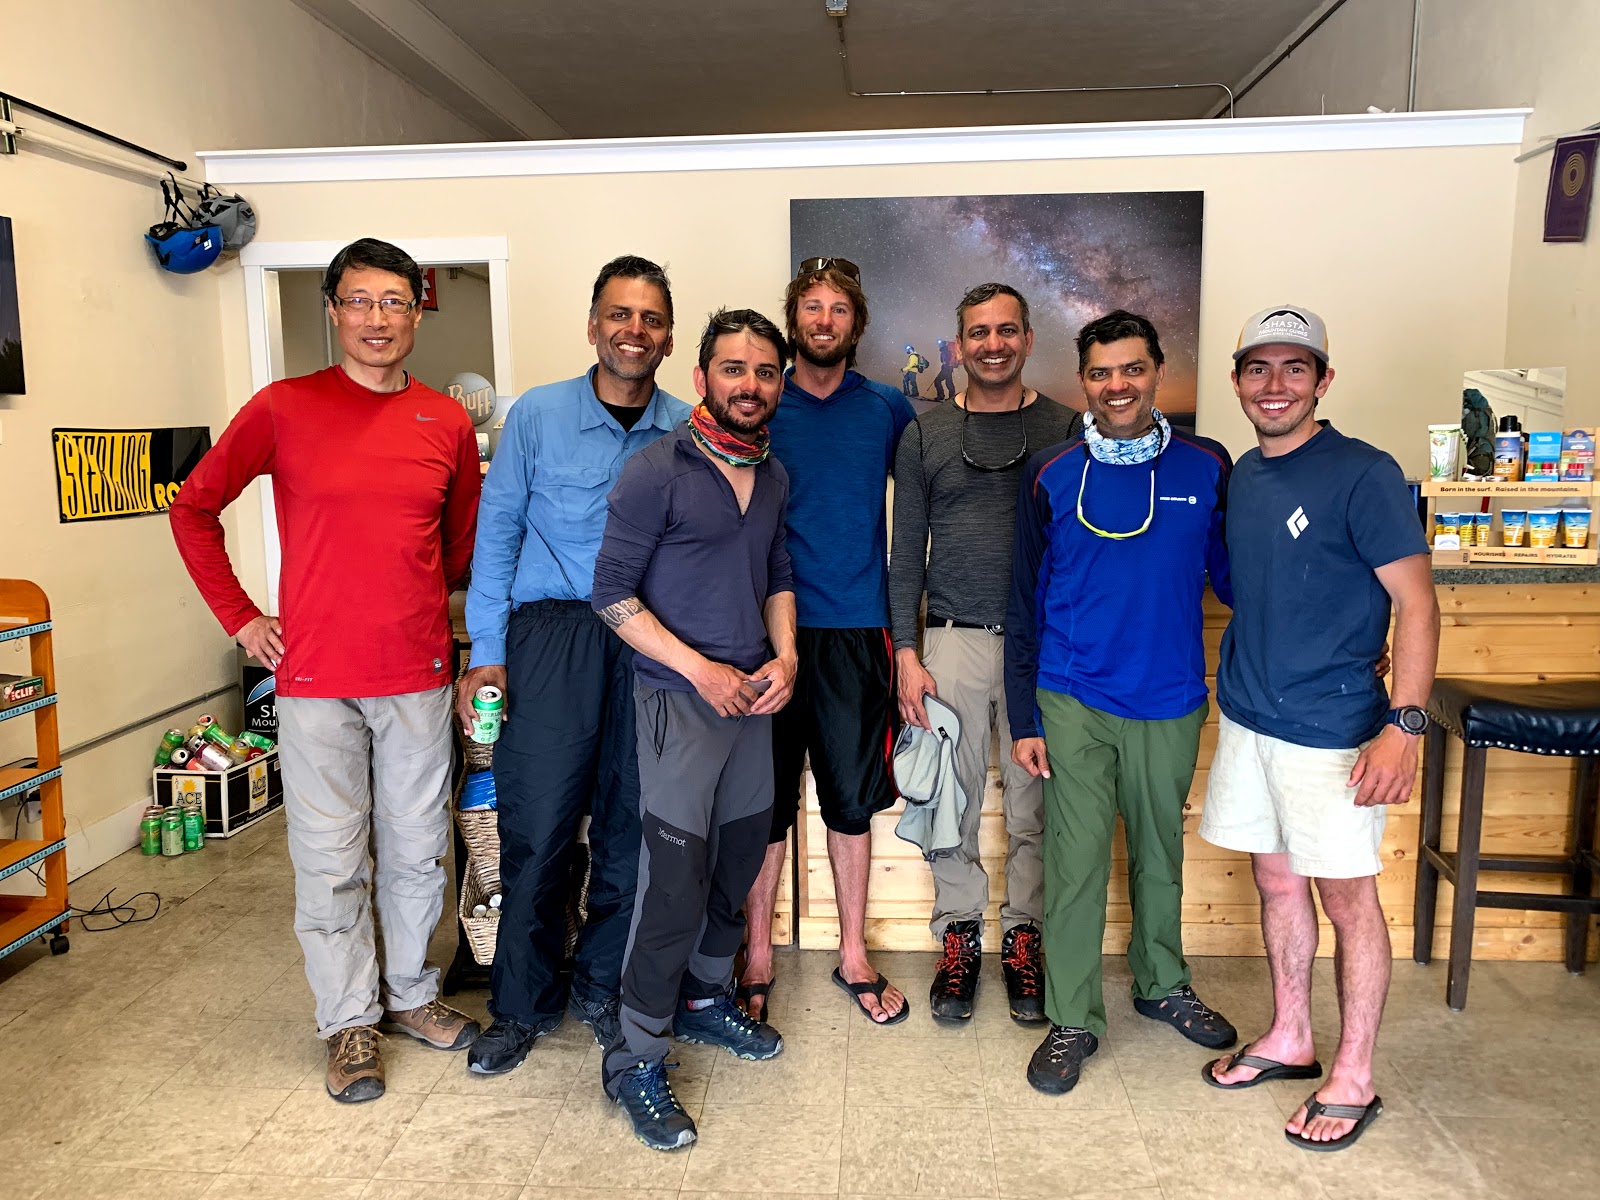
 |
| From left to right: Vikas, Jai, Clayton, Ankur, Alex, Jimmy and Casey |
 |
| Ready to conquer Mt. Shasta |
We reached Horse Camp at around 2pm. Casey and Clayton used a shovel to create flat grounds for our tents. They then taught us how to anchor tents in snow. You dig a hole, bury a twig in the hole, wrap the string around the twig and tie a trucker's hitch knot. It is really easy to do and is strong enough that you can rappel on it !
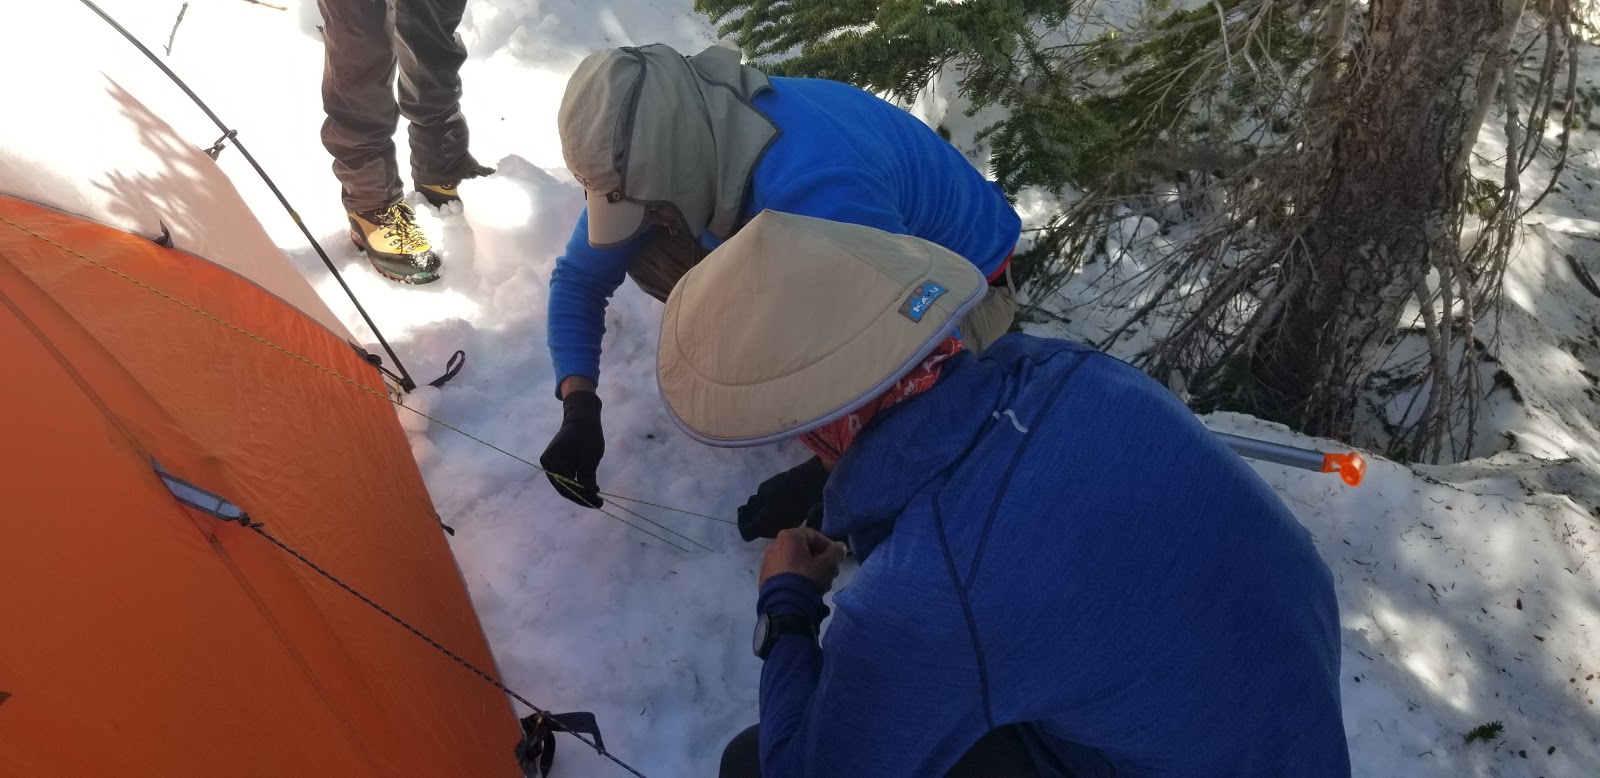 |
| Anchoring the tent using trucker's hitch knot |
The guides then proceeded to create a dining area. This was really impressive. See the picture below. There were benches for us to sit on and enjoy the food.
 |
| Kitchen and dining area ! |
 |
| Running water from stream |
- Proper technique to hold ice axe
- How to climb on steep slopes using French steps. How to add a rest step to be more efficient and general safety
- How to self belay and self arrest using ice axe if you have a fall. We practiced on a small hill by simulating various types of falls and self arresting using ice axe
- We also learned to properly glissade (slide down) on slopes. This is a super efficient and fun way to climb down
I felt a lot more confident after learning these skills.
Breakfast and dinner was included in the guided package. We had delicious kale soup and burritos for dinner.
Day 3: June 15, 2019. Climb from Horse Camp to Camp 2
Horse Camp Elevation: 7651 ft
Camp 2 Elevation: 9544 ft
Elevation Gain: 1900 ft
Distance: 1.5 miles
You can see the pattern - we climbed more than double the elevation in fewer miles ! The average grade for today was 25%.
We started at 9:50am and arrived at camp 2 at around 12:20pm. Most people camp at Helen Lake on day 2. Our guides decided to camp a little lower.
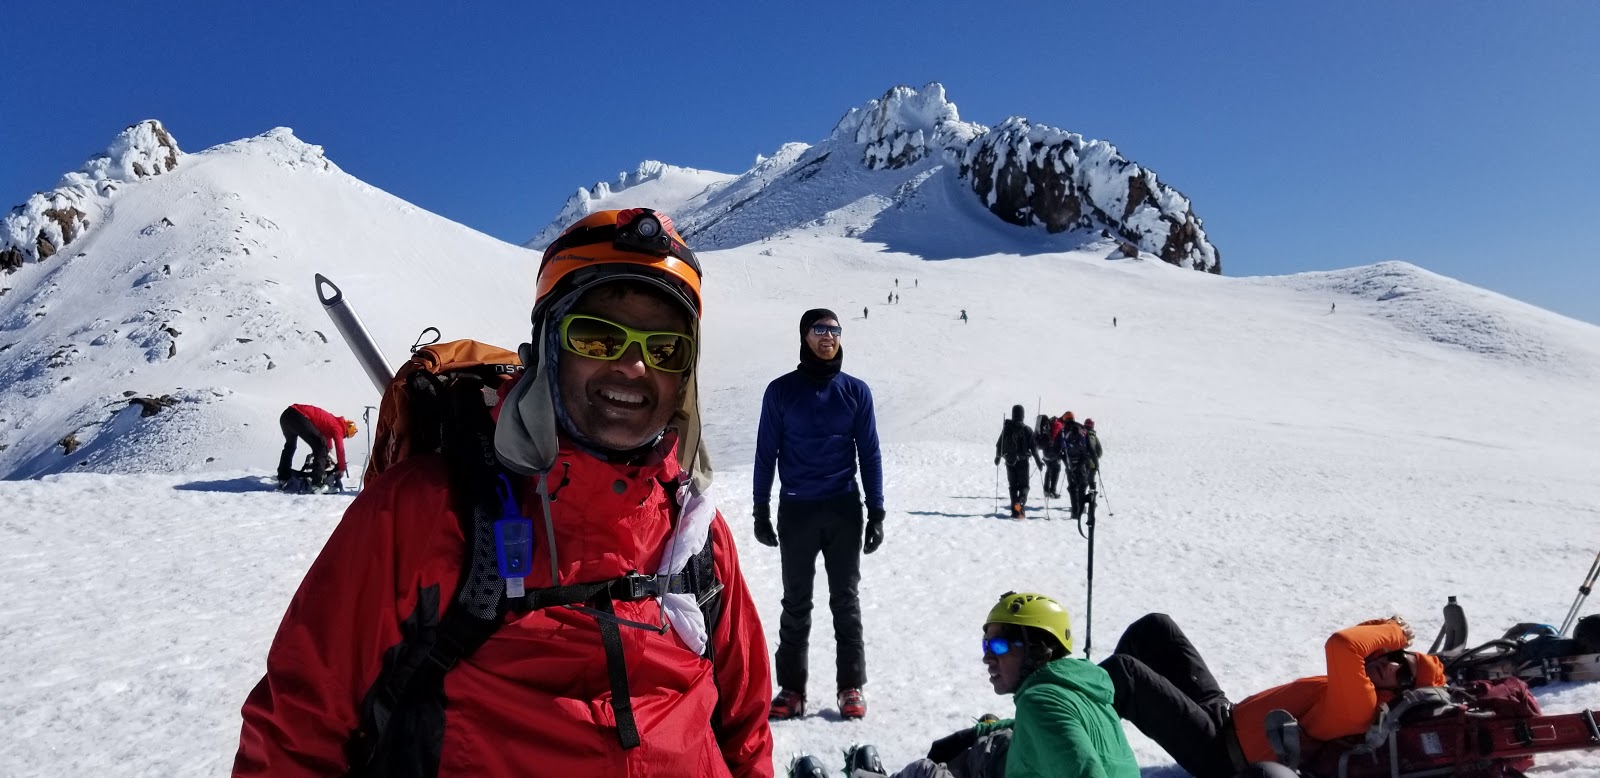
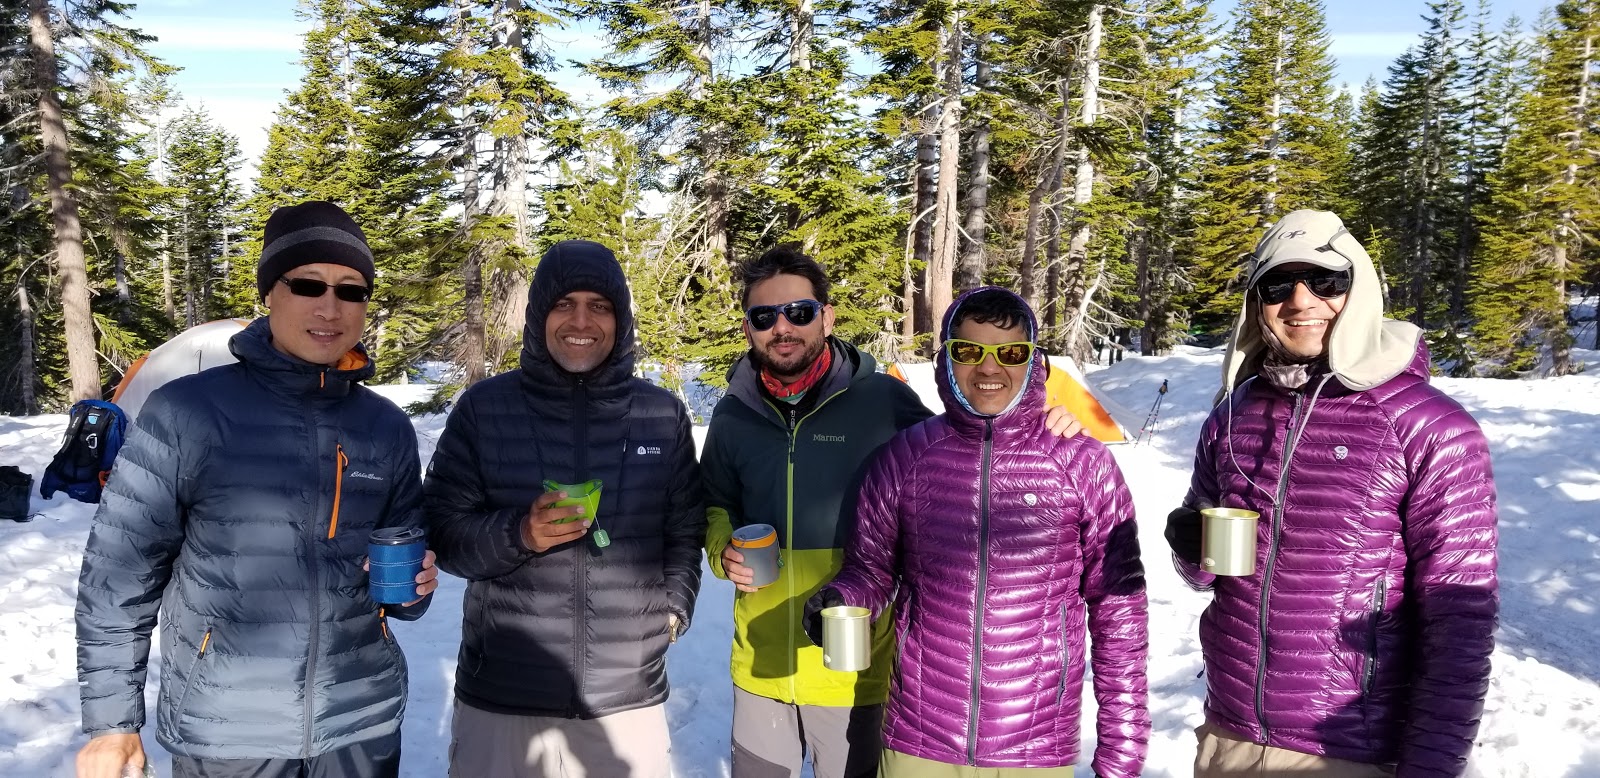 |
| Enjoying a bit of warm fluid in the morning before heading out for Day 2 |
 |
| Enjoying some trail mix after a particularly steep stretch to camp 2 |
Finally reached camp 2 at around 12:20pm We didn't really get to take many pictures - this was the most disappointing part of the treks. Our guides were really strict about 10 min breaks. That was barely enough time to set down the backpack, drink water, eat a snack and take a bio break. We missed out on a lot of great photo opportunities.
Short video of me finishing the trek on Day 2.
 |
| Panoramic view of camp 2 area |
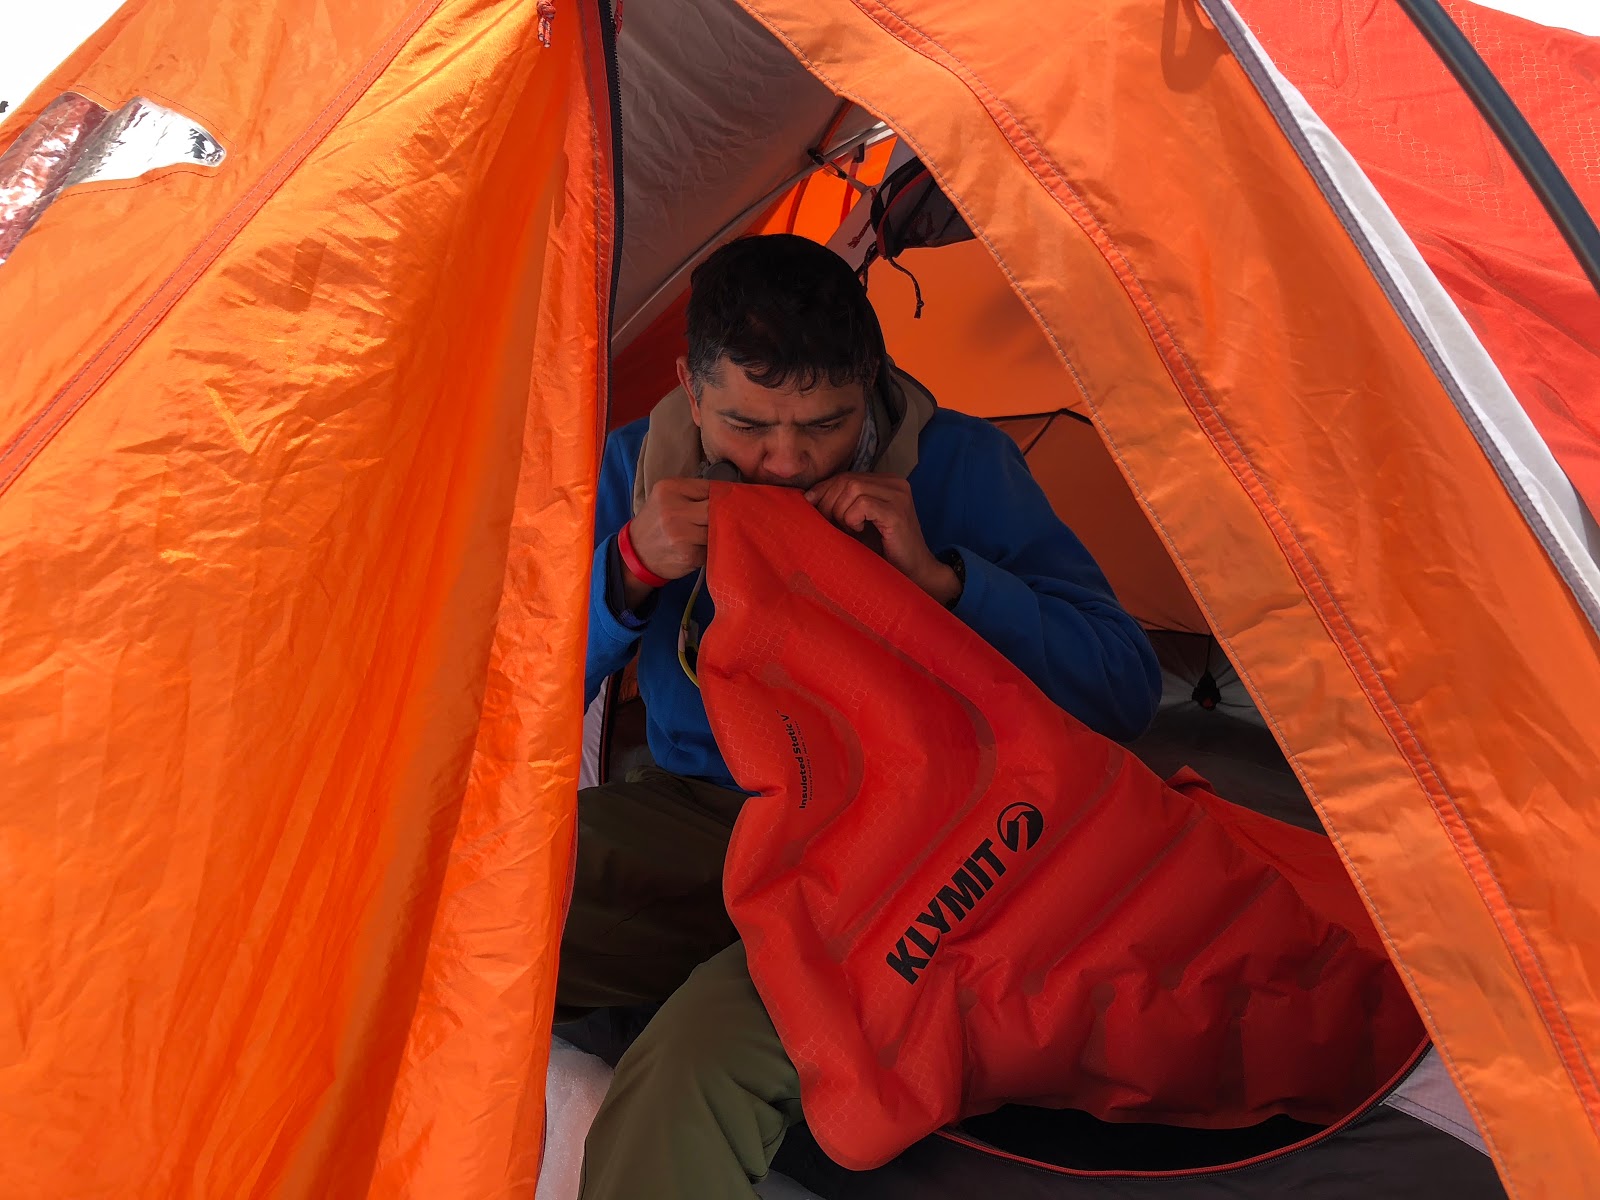 |
| Struggling to fill air in my sleeping pad. The Oxygen level is already 30% less at this elevation |
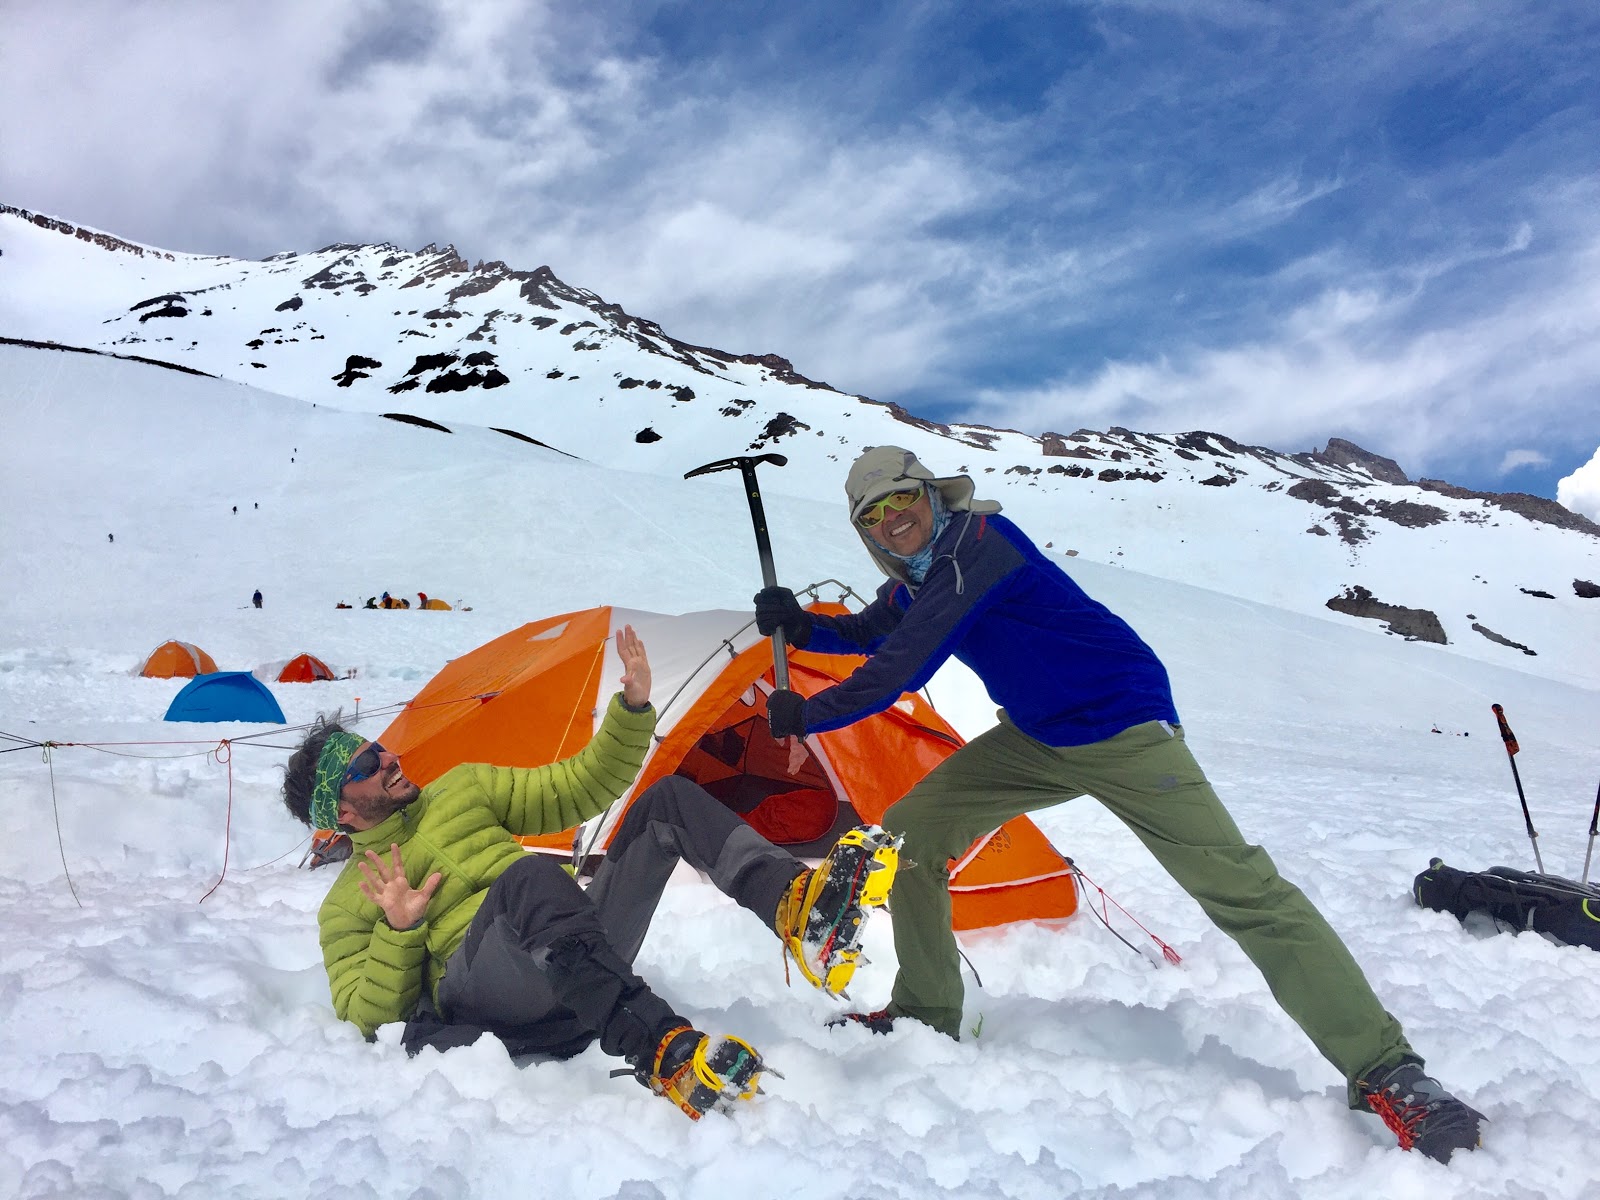 |
| This ice axe usage was definitely not part of our training but it is a handy skill nevertheless :) |
 |
| Enjoying early dinner (4pm) so we can retire early and be ready to start the summit push at night |
We saw ominous dark clouds, rain and lightening in the distance. We were really worried that if the clouds reach us then our climb will be jeopardized. We cannot go up in rain because it will be too hazardous. Fortunately the clouds stayed away and we had a perfect climbing day.
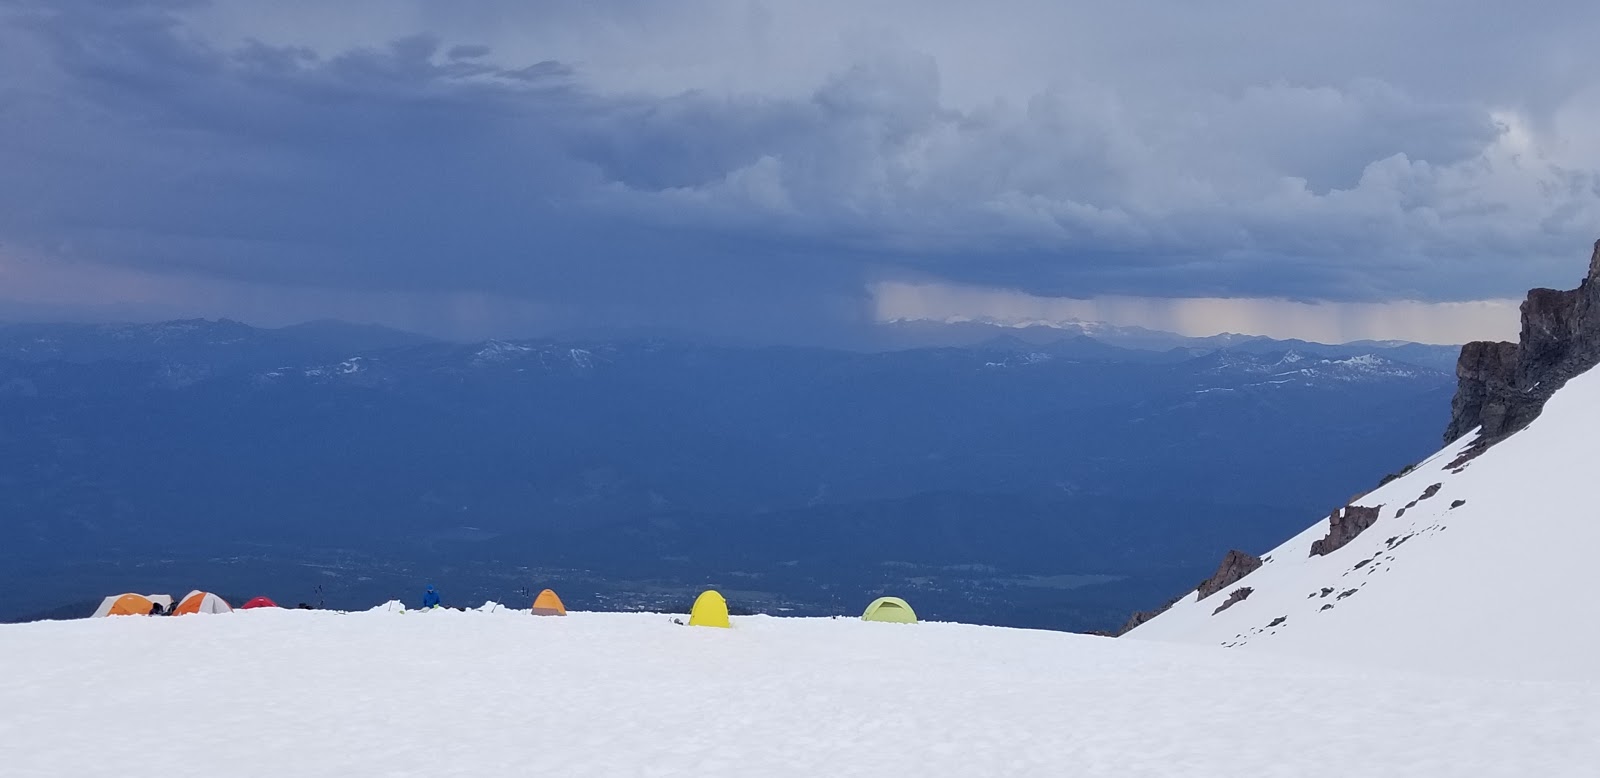 |
| Rain rain stay away |
We had a summit talk before going to bed. The guides explained exactly what we will need to take with us so we could pack accordingly. They will wake us up sometime between 1am and 3am to start the climb.
Day 4: June 16, 2019. Summit Day. Camp 2 to Top and back to Bunny Flat Trailhead
Camp 2 Elevation: 7,651 ft
Top of Mt. Shasta: 14,180 ft
Elevation Gain: 6,500 ft
Distance: 4.3 miles
It gets steeper as we go higher. The average grade for the climb was ~29%. Some sections had a 40% grade. It was really hard. After summitting we got back to Camp 2, packed all the tents and other stuff in our packs and headed back all the way to the Bunny Flat Trailhead.
We were woken up at 1:45am. We had to get ready quickly. There were no toilets so we had to use packout bags to do our business. The packout bag had a piece of paper, two brown bags with kitty litter (minimized moisture and smell) and a plastic bag. You are supposed to do your business on the paper, sprinkle kitty litter on it, double bag in the brown bags and then finally pack it in the plastic bag. This now becomes part of the backpack and you have to carry it all the way down!
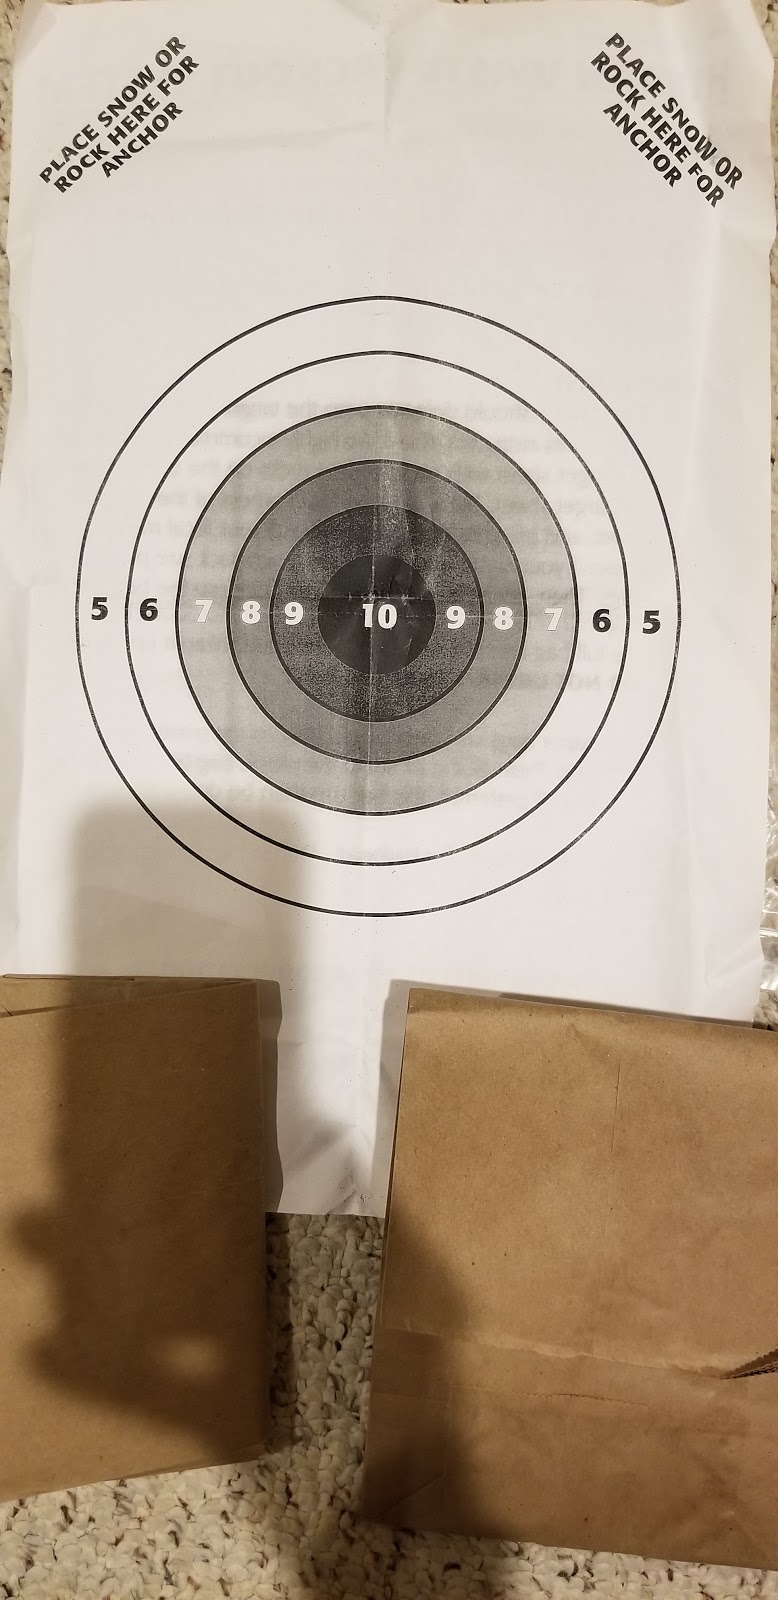 |
| Target practice for pooping ! |
We started at 3:05am in dark with our headlamps on. We were wearing crampons and harnesses but we were not roped up yet. Here is a short video of us walking in the dark:
The climb can be divided as:
- Camp 2 to Helen Lake
- Helen Lake to Red Banks while going through the Heart
- Thumb (rock shaped like a thumb)
- Short hill
- Misery hill
- Football field
- Final ascent
It was really slow going. The slopes were so steep that we had to create switchbacks (zig zag pattern) to climb up the slope. Soon after Helen Lake we were roped up with our guides. We frequently lost our balance or had a minor slip but fortunately it was never serious.
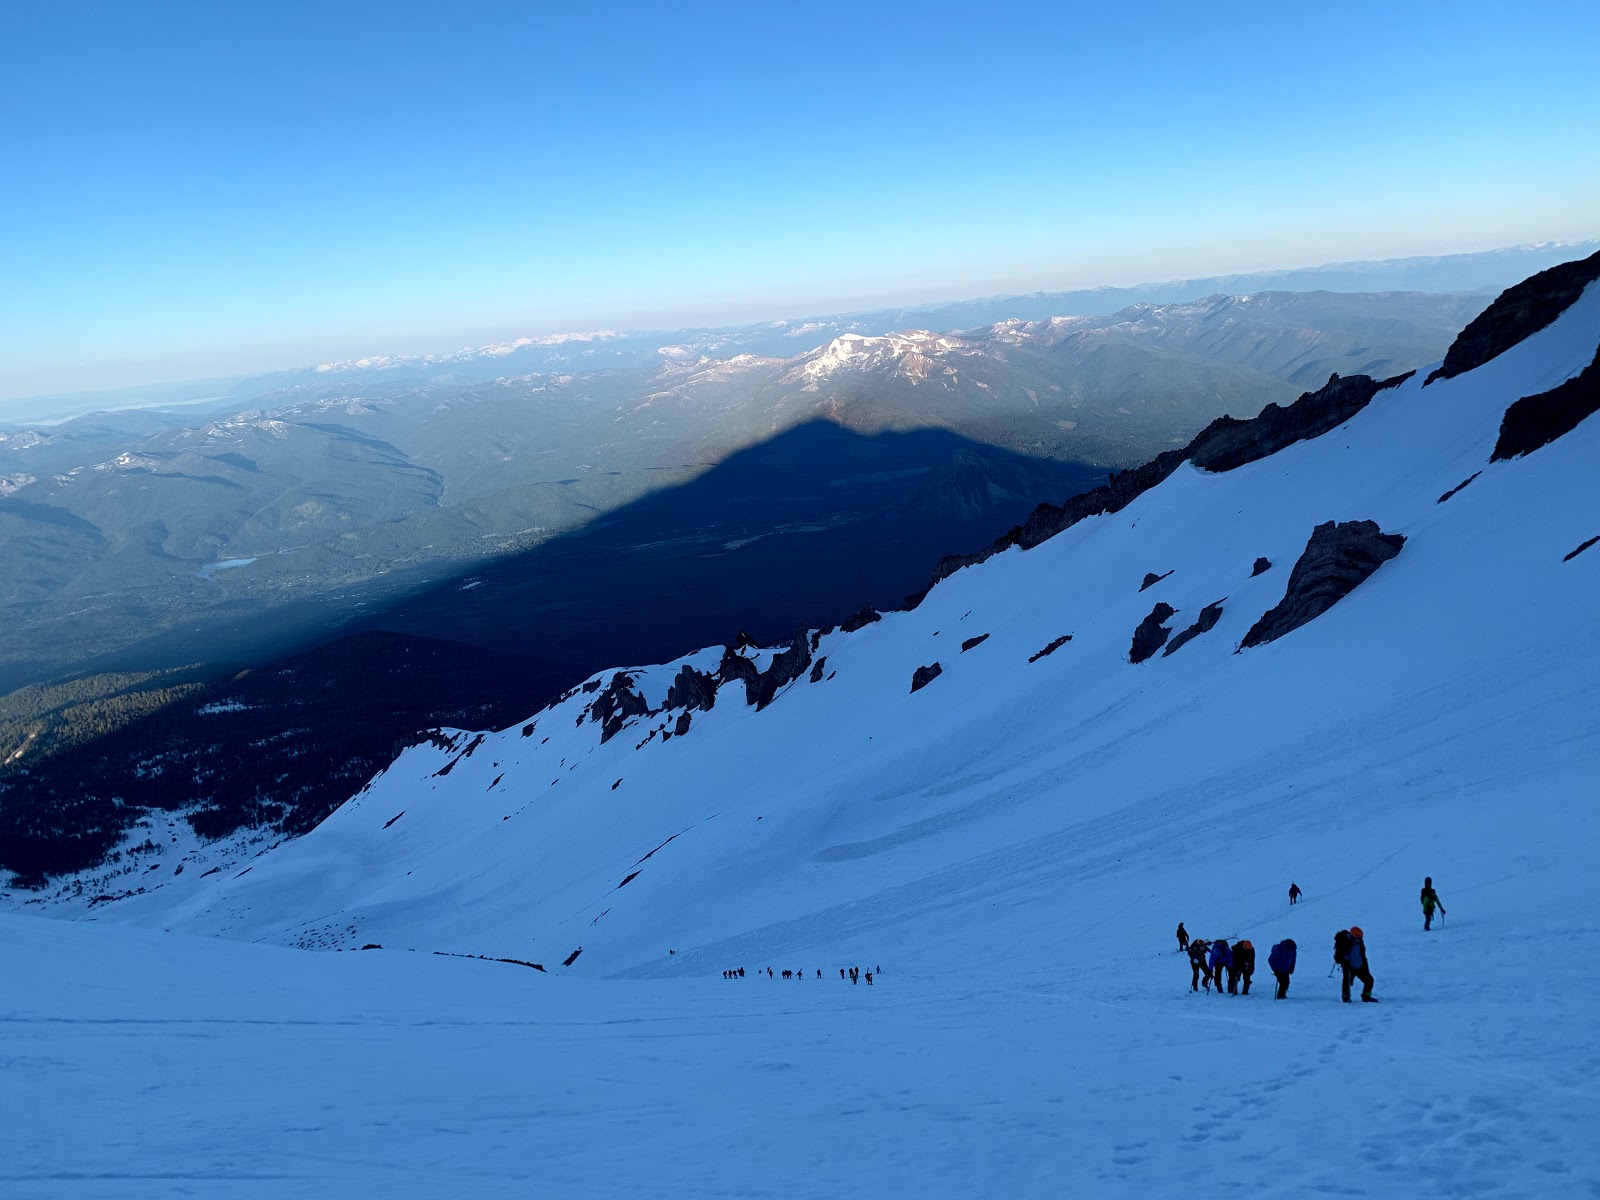
 |
| Time to get the ropes on. Notice the tents far below, steep slopes and rough snow which was really hard to walk on |
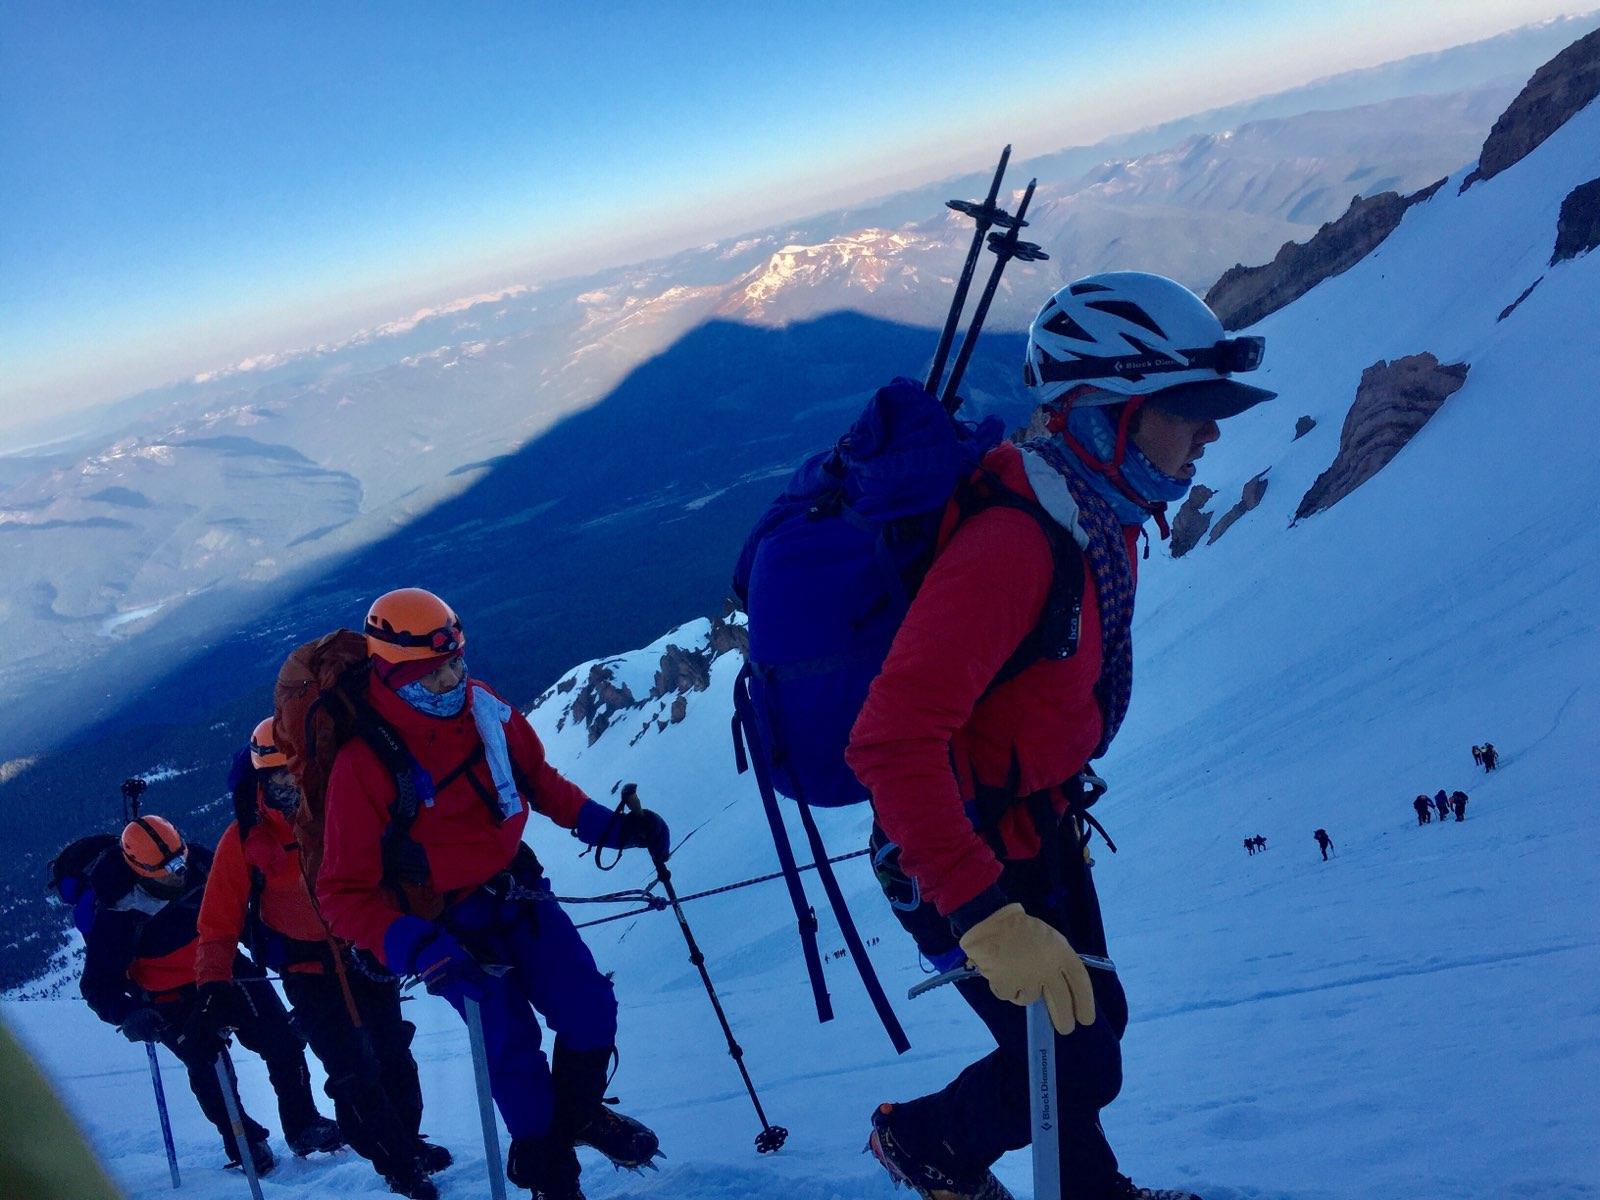 |
| Clayton (guide, in the lead), me, Vikas and Ankur |
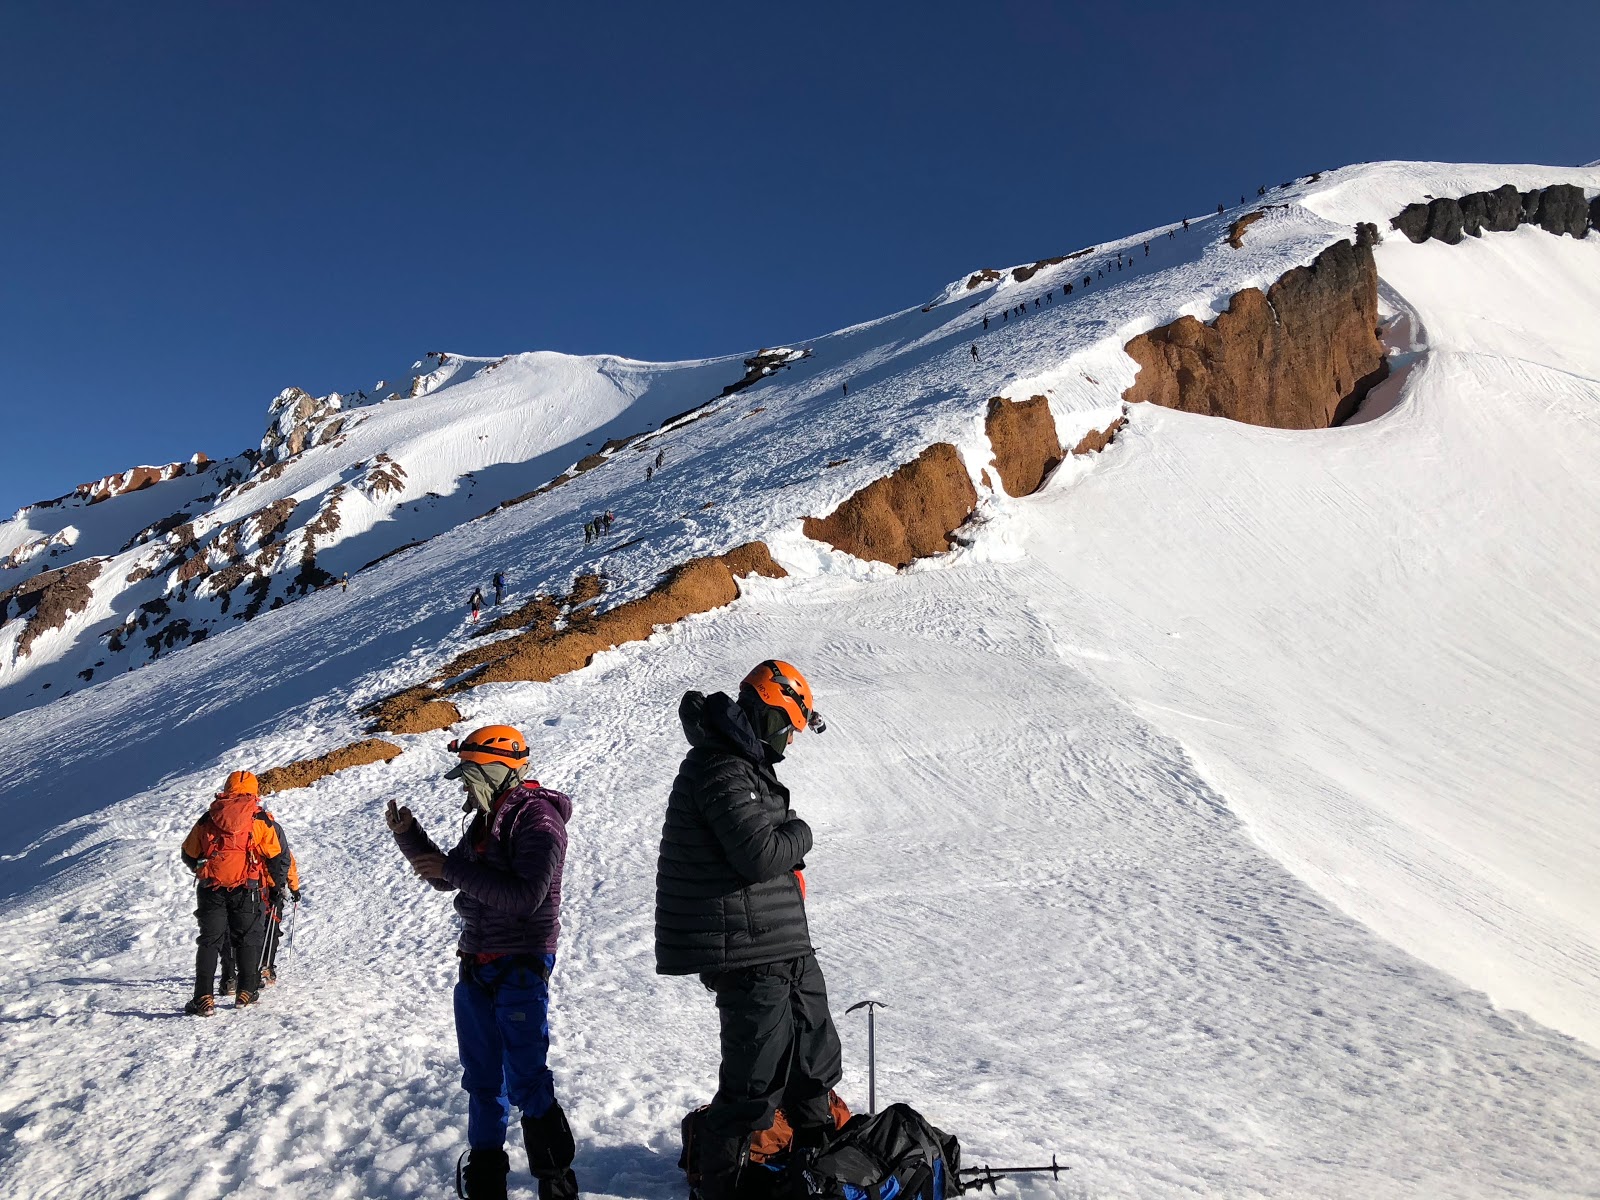
We passed through an area which is nick named Bowling Alley because it is common for falling objects to pass through that section on the way down. We saw a couple of water bottles and a small rock tumbling down. As soon as someone spotted a falling object, he/she would immediately shout and alert the climbers below. That way everyone could be safe. One of the bottles came directly at us and we had to step out of the way to avoid it.
 |
| At nearly 11,000 ft now. You can see the Red Banks (red rocks) on the top. Also note how steep this section is |
We saw some amazing views along the way. The Sun was up but it was still behind the Thumb rock. It created a beautiful shadow.
 |
| Mountain shadow - looks truly majestic |
We reached the "Thumb" at around 7:30am. Elevation 12,800 ft. Another 1,300 ft to go. Konwonkiton Glacier is on the other side of the Thumb.
Now we were out of the shadow of the Sun. The snow from here on was blinding. It was hard to take off our sunglasses even to put on sunscreen. It was hard to take pictures because the camera screen is not very visible with sunglasses. We simply pointed our cameras in the general direction and hoped that we captured some of the magnificent views.
 |
| "Thumb" can be seen in the background. |
From here the next section was Short Hill. This was the toughest section for me. It was really steep and the snow had frozen into strange, mini icicle type formation. It was not easy to walk on it.
 |
| You can see the "Short Hill" section in the background. This was a killer |
It took us about 30min to climb the Short Hill only to encounter the Misery Hill next. Short Hill is a 400ft climb in less than 0.3miles. Misery Hill is named aptly because (a) it is hard to climb and (b) it is a false summit. The real summit is not even visible yet.
 |
| Misery Hill climb. It is a false summit |
Top of the Misery Hill is 13,700 ft. From here there is a relatively flat stretch which is known as the Football Field
 |
| On top of Misery Hill. Football Field to be tackled next |
We finally reached the summit at 9:30am - around 6:30hrs after we started. It was almost as crowded as Everest :) :)
The guides started rushing us and wanted us to leave within 10 minutes. At this point all of us revolted and said we need more time to take pictures and enjoy the summit experience.
 |
| We added our name to the register to officially mark the occasion |
Now it was time for me to do my traditional headstand. Clayton (guide) started objecting to that as well. I understand that they were concerned about safety but frankly this felt like too much baby sitting.
 |
| There was no flat ground here. It was hard to balance on soft snow and with all the hiking gear |
It was a clear day and the visibility was really good. We got incredible views.


We then got in the line to get our pictures taken on the highest rock on the summit.
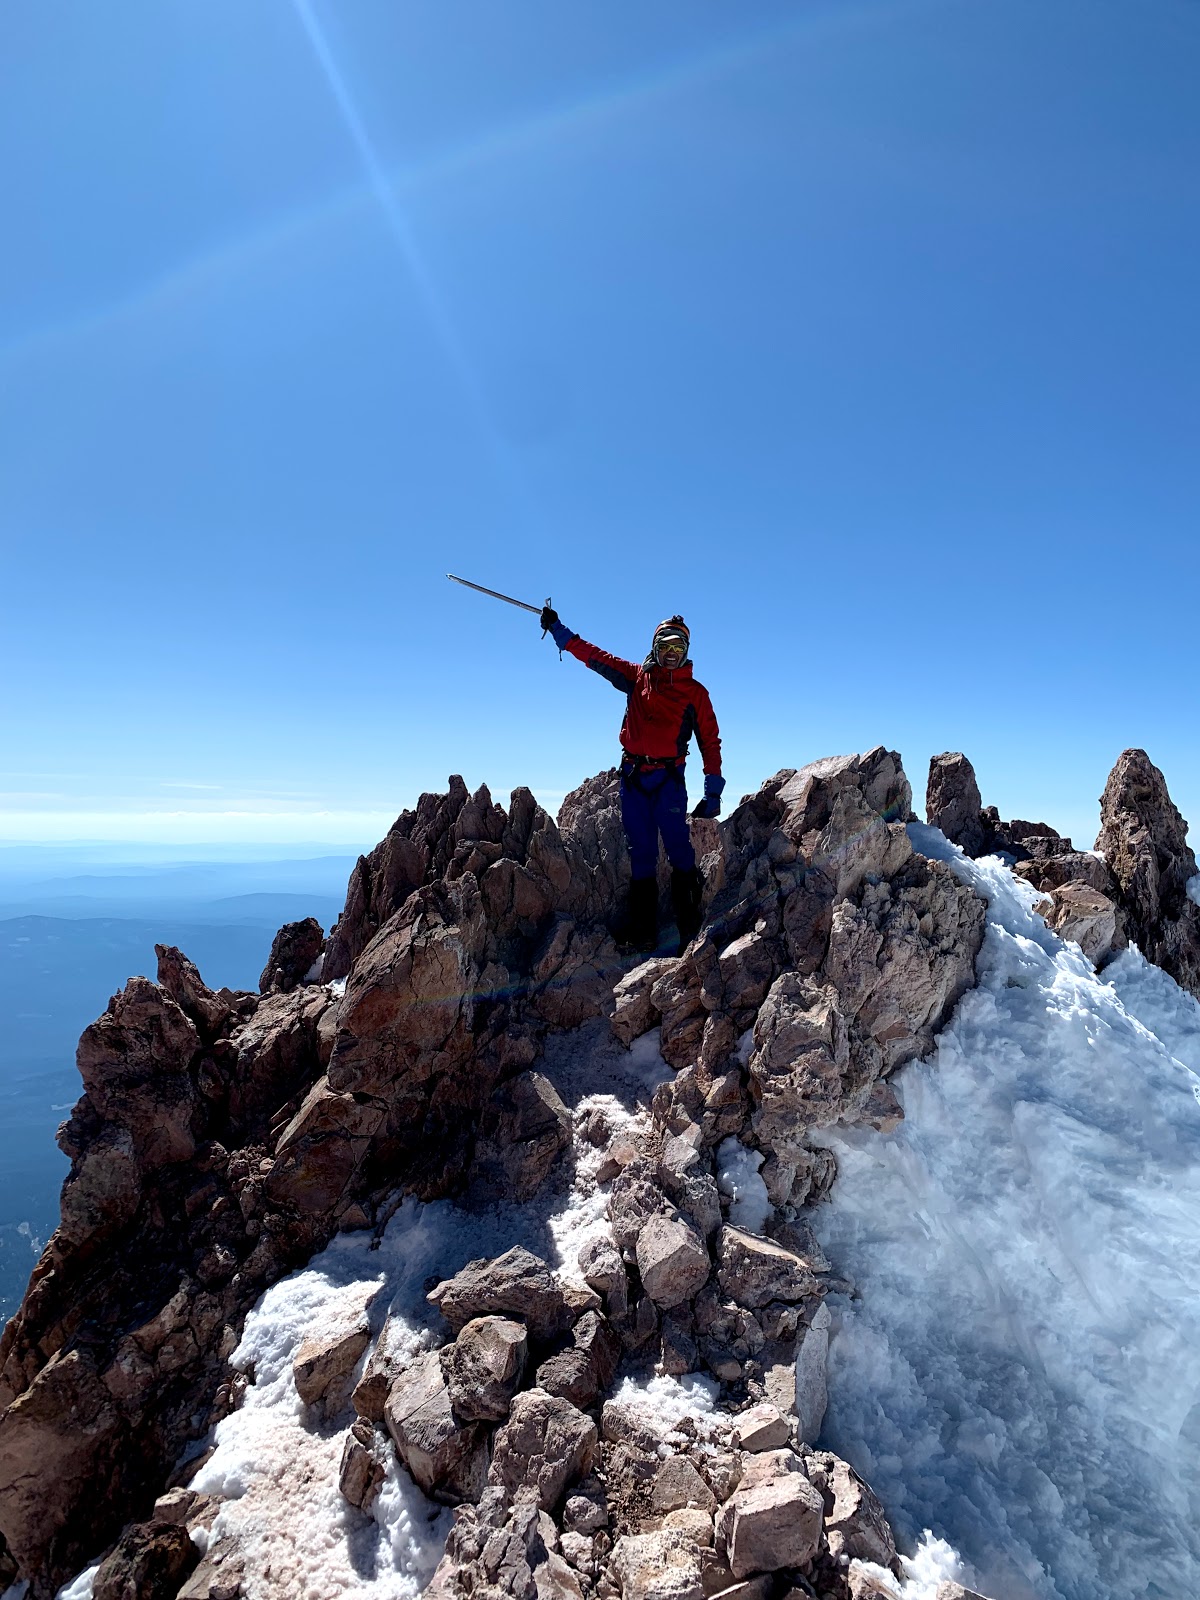
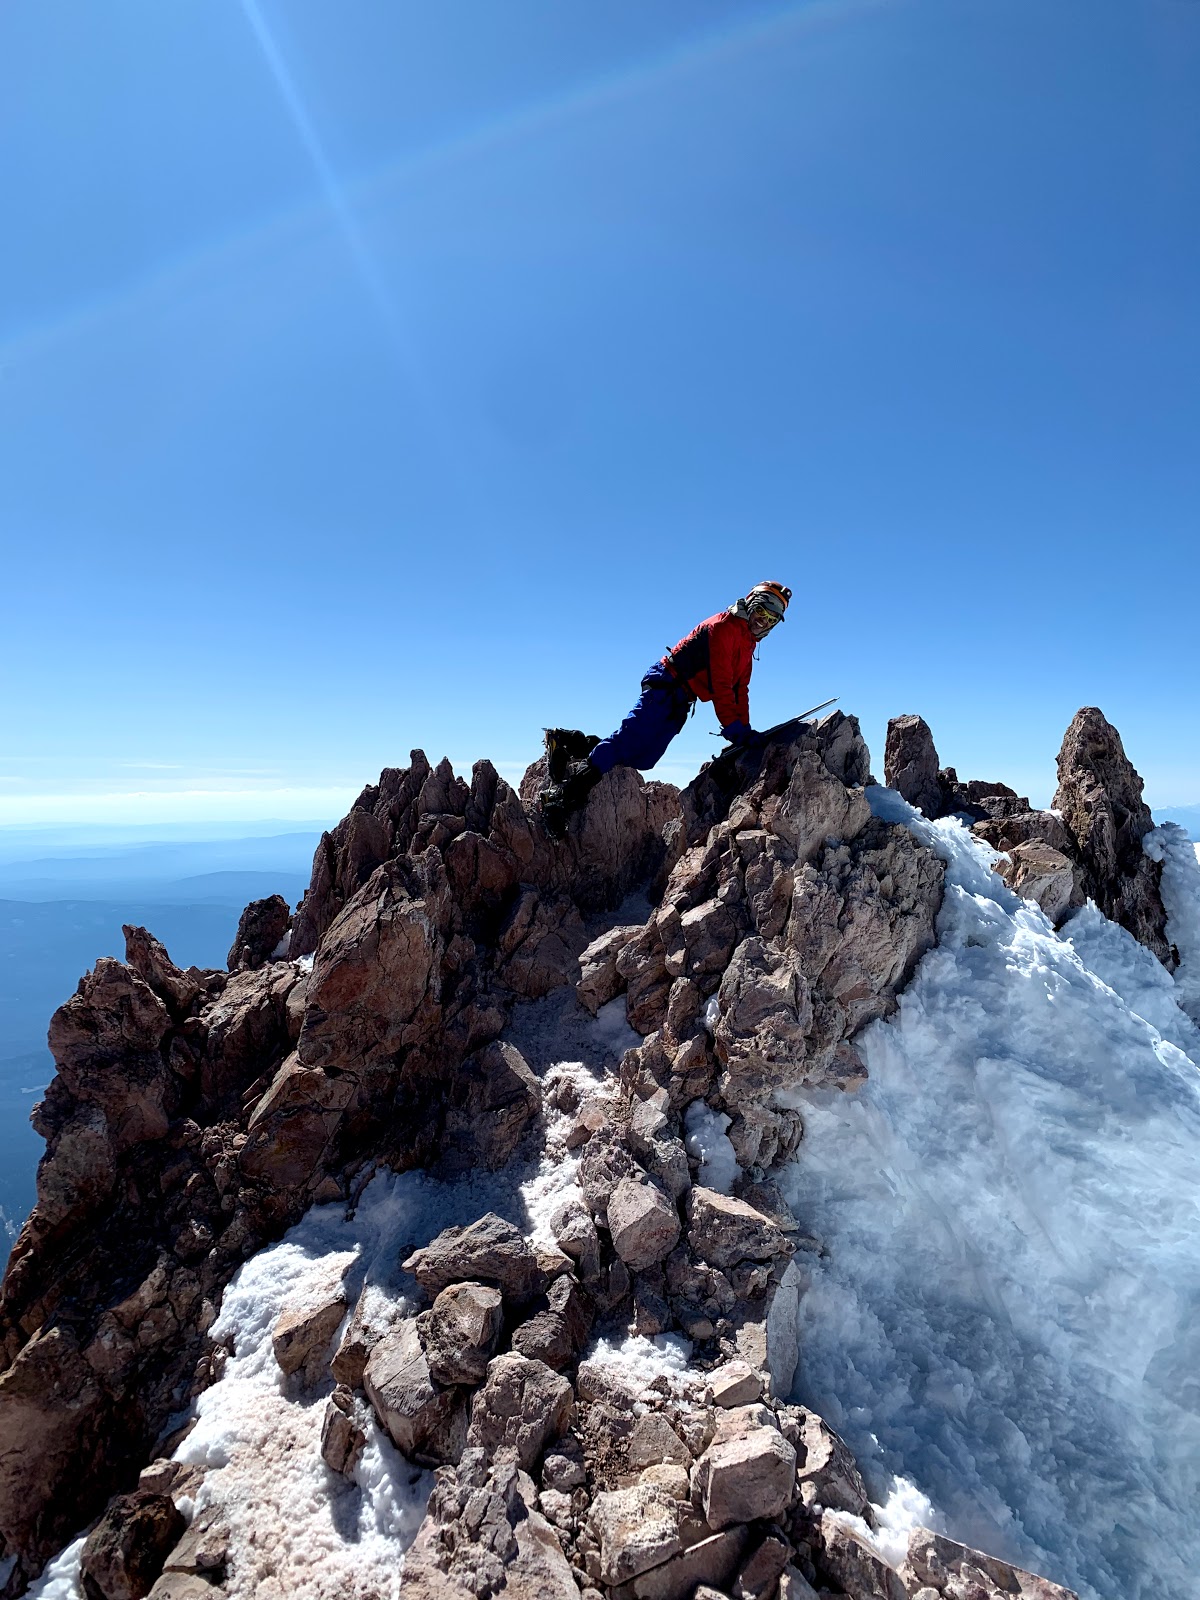 |
| How about some pushups? :) |
It was time to get back down to earth. I was able to climb down fairly quickly. We even managed to capture some pictures we had missed on our way up.
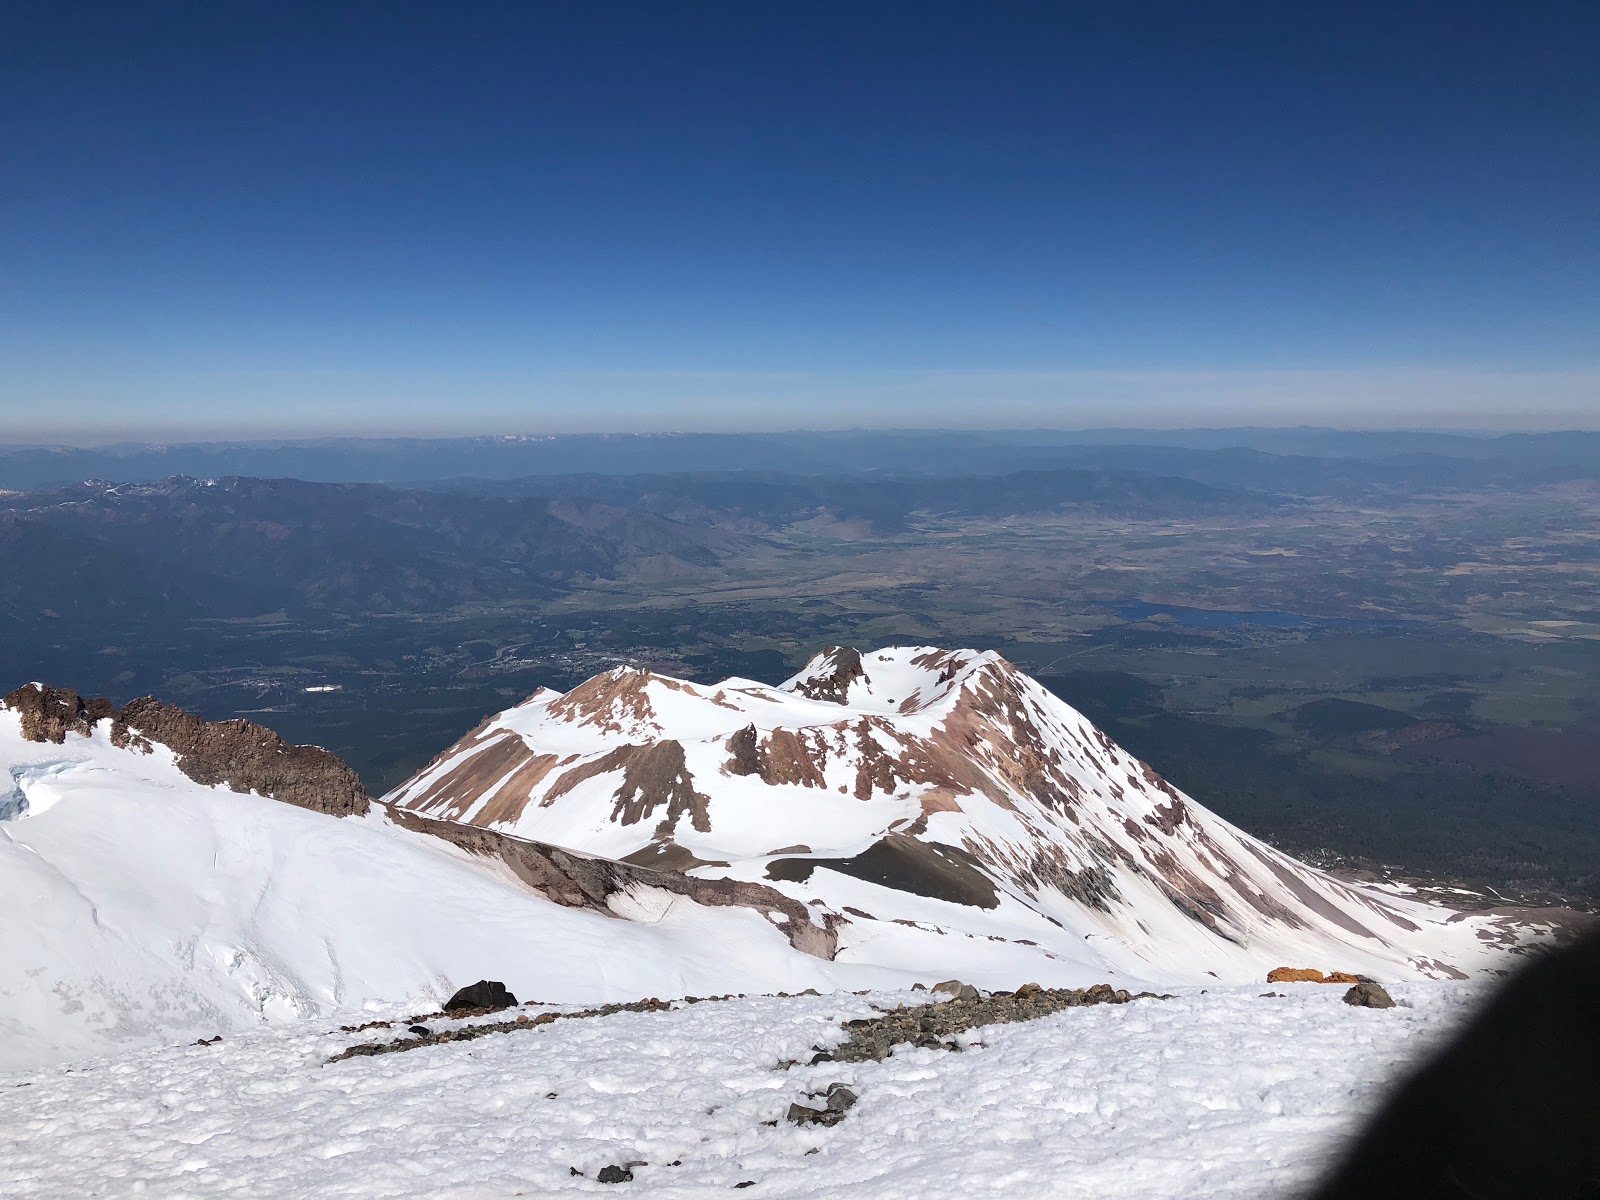 |
| Mount Shastina |
 |
| Great view looking down from the top of Misery Hill. You can see the Thumb rock in the distance |
Some people were glissading down from the Thumb. We were quite tempted to do that but the guides told us that the snow was still too hard to slide on (we will pick up a lot of speed) and this was an area prone to falling objects.
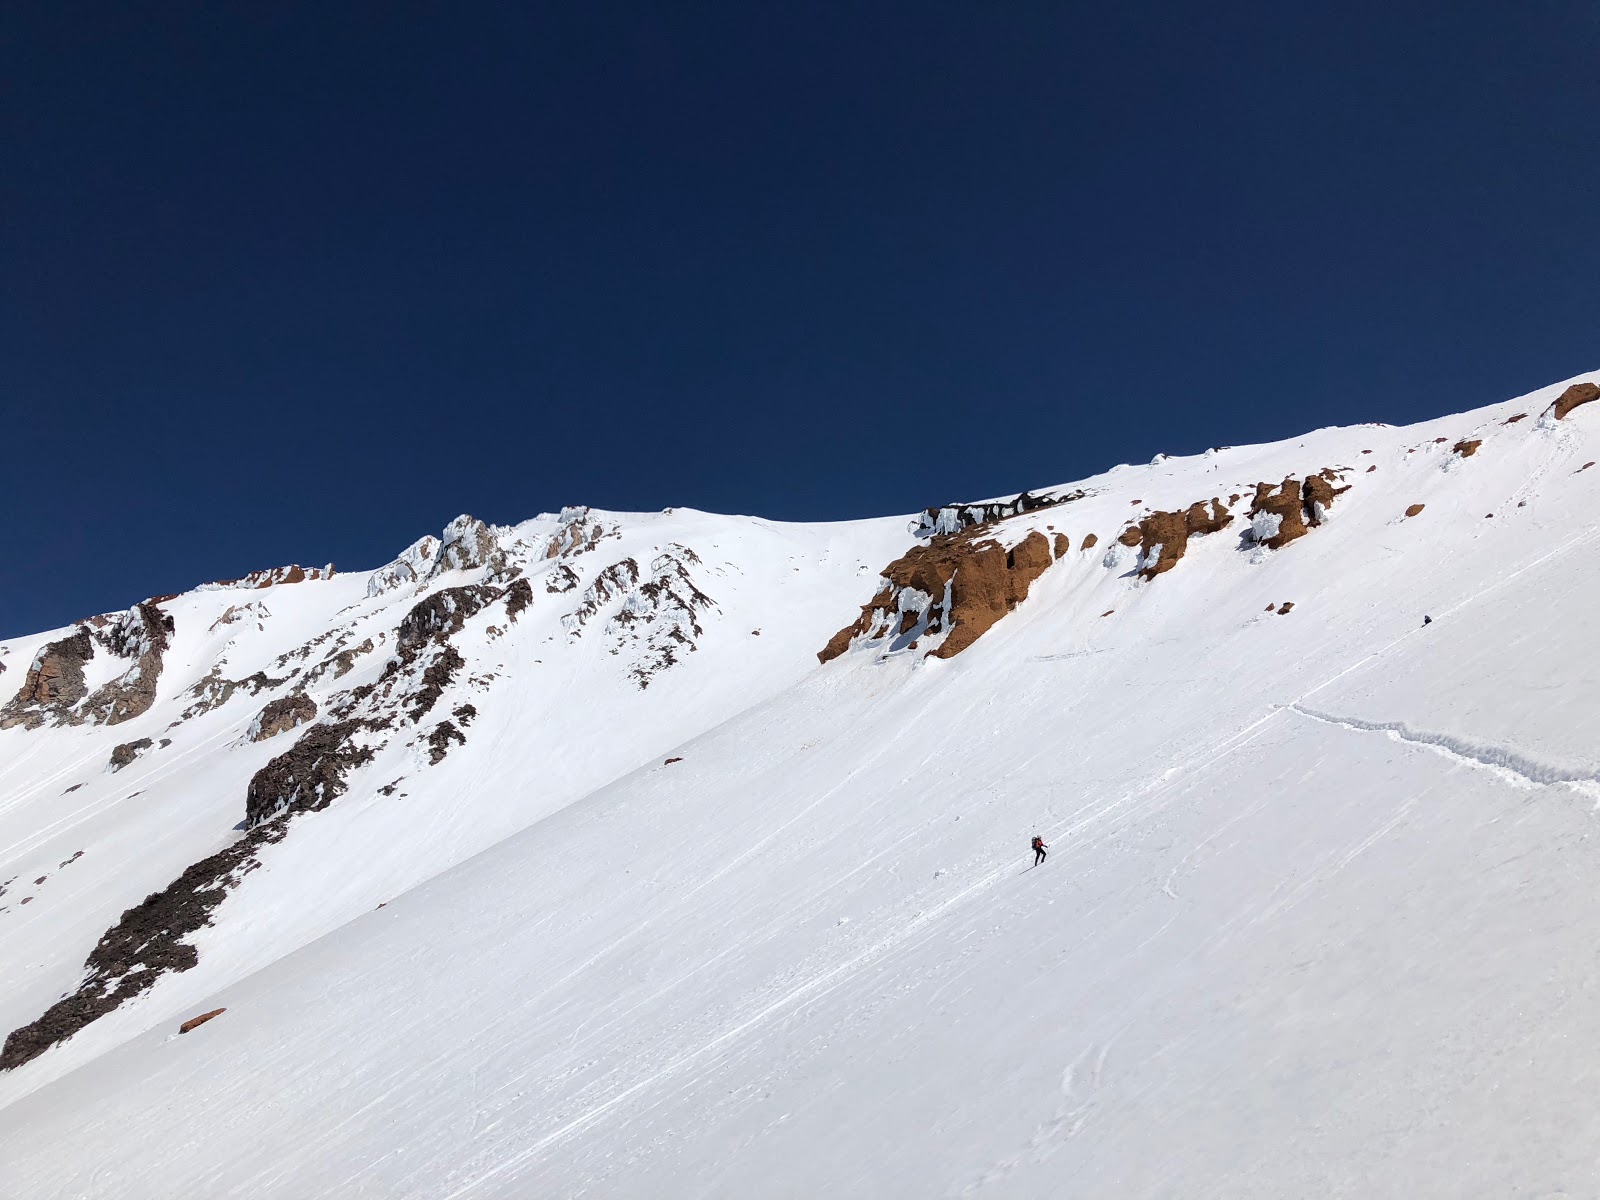 |
| You can see a person glissading down. The horizontal track is for navigating the slope using a zig-zag path |
Finally, after we got close to Helen Lake we got a chance to glissade down. We reached the campsite, packed up all our stuff and continued walking / glissading down. See the video below.
Besides summitting, glissading was the most fun part of the entire climb.
We were able to glissade down quite a bit but unfortunately the last 1.5+ miles had to be covered on foot. It felt interminable. It felt we will never reach our car. Finally after what seemed like eternity, we spotted the parking lot. After three grueling days of hiking, we were back to where we started.
 |
| Believe it or not, we were on top of that mountain just hours ago !! |
We all got together in Shasta Mountain Guide office for celebratory drinks (sparkling water in my case) and said final good byes to our guides and fellow climbers.
This was an incredible experience. While I have been to Everest Base Camp (17,600 ft) and Stok Kangri (20,000 ft), this was harder in some ways because we had to carry our own load, had to negotiate much steeper slopes and learn some proper mountaineering skills.
The first thing Vikas, Ankur and I talked about after the climb?
What's next??? :)

4 comments
Good work Jai!!
ReplyDeleteAwesome Jai! 👍
ReplyDeleteVery nice and thrilling ��
ReplyDeleteAmazing views and good hike.
ReplyDelete